Join your first Windows device to Intune!

Introduction to Intune
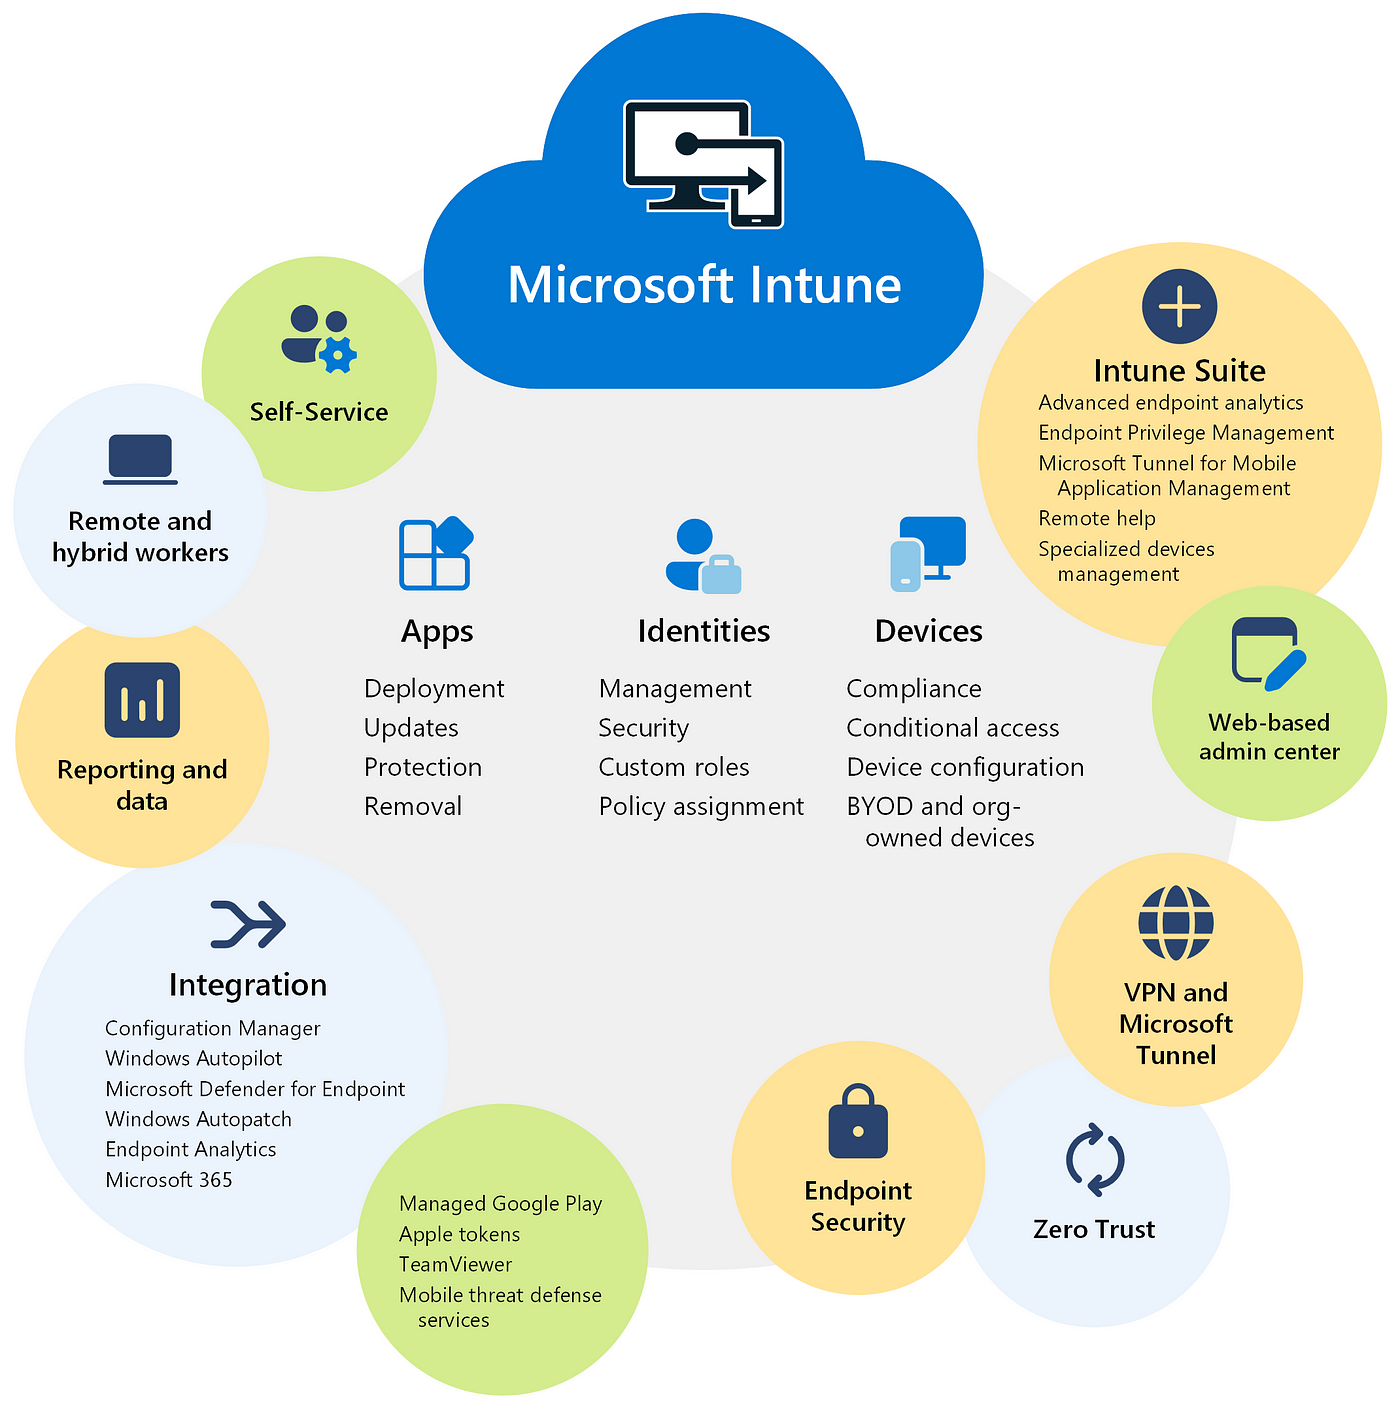
Intune is a mobile device management solution that helps endpoint administrators manage their endpoints, which include devices such as iOS, Android, Windows, and Mac. This involves all different tasks around managing endpoints, such as app deployment, policies, and security. These are only some of the features Intune has.
Yes, that was an explanation that isn’t simplified for beginners. Let me try to make it a bit easier to understand. I can’t cover all the functionalities of Intune in this blog, but I will try to explain overall what Intune is.
Most IT guys are lazy (including me), so I want to make it easy for myself. You have probably tried installing the exact same application on several devices, where you had to schedule a time with the end users, and it takes a lot of time before you have installed the application on all devices.
This isn’t the case with Intune. If your devices are enrolled in Intune, you can deploy applications to either devices or users with or without user interaction.
App deployment is just one of the features Intune has. You can also manage endpoint security and policies. Intune has a reporting function as well, so you can follow along with your device's compliance and current state.
I have only scratched the surface of Intune, but this great overview gives you an idea of how big Intune is.
License requirements
Before you can start enrolling your devices in Intune, you have to make sure that you have the correct licenses for the users.
The Microsoft Intune Plan 1 is a standalone license, and Intune Plan 2 and Microsoft Intune Suite are add-ons that give extra features. Microsoft Intune Plan 1 is included in many licenses, such as Microsoft 365 Business Premium or Microsoft 365 E3/E5.
Microsoft Intune Plan 1 includes more than enough for our use, so we won’t cover the other two licenses in this blog post.
A good tip when you are unsure about which licenses to use: https://m365maps.com/’
It’s time to enroll your first Windows device in Intune!
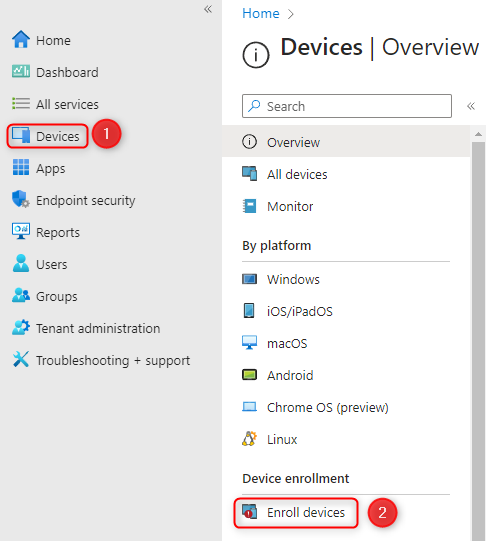
If you have a tenant who hasn’t been using Intune before, you have to change a setting in the Intune console. If you navigate to Intune.microsoft.com -> Devices -> Enroll Devices.
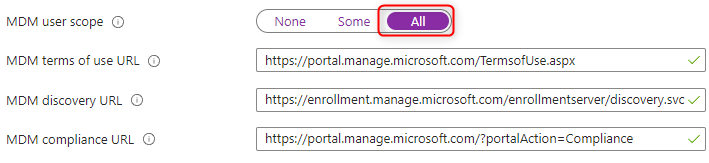
Next up, you would have to pick Windows Enrollment -> Automatic Enrollment. From here, change the MDM user scope to “All” and save.
When changing the MDM user scope to “All”, all users can enroll devices into Intune. If you want to restrict enrollment to only specific users, you can choose “Some” and create a group for those who are allowed to enroll their devices.
The next step in enrolling your device is to start your Windows PC, or in my case, a VM that has Windows 11 installed. I have done a little work up front, installed Windows, and created a local user on a virtual machine.
When unpacking a PC and starting it for the first time, you have the option to join the device to Entra without creating a local user via out-of-box experience (OOBE). In this blog, I’m showing where a local user has been created on the PC.
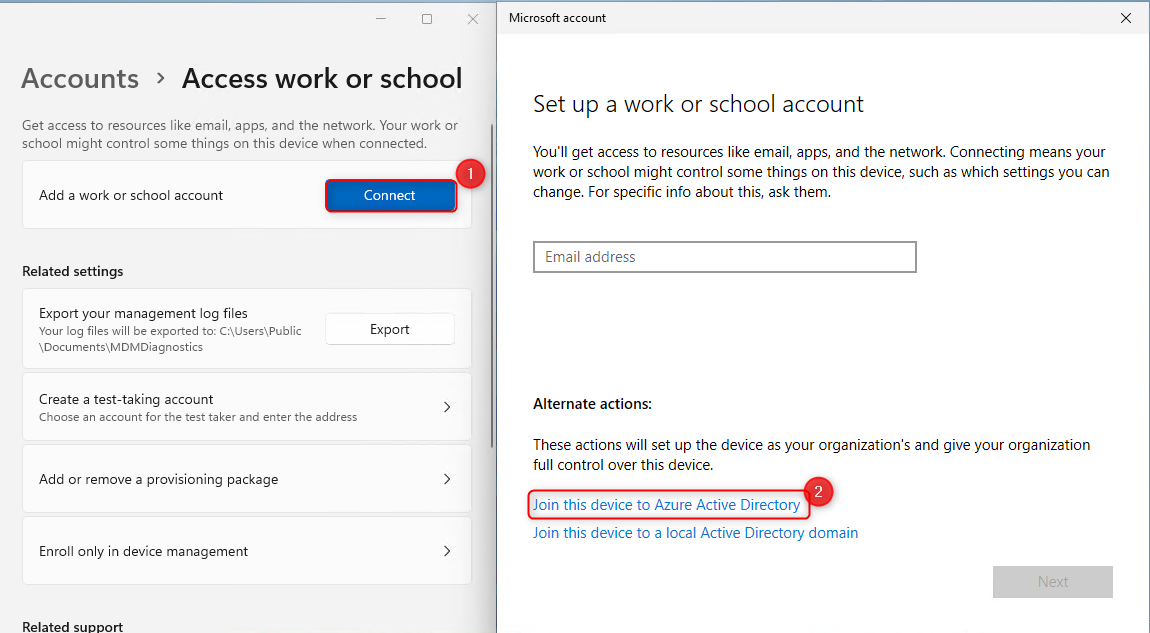
We would have to Entra ID join our Windows PC, so it will be enrolled in Intune. Open up your PC and search for Access work or school -> Connect -> Join this device to Azure Active Directory.
There will appear an Entra ID pop-up where you will have to enter the user's email address and password. You will now see an image like the one below.
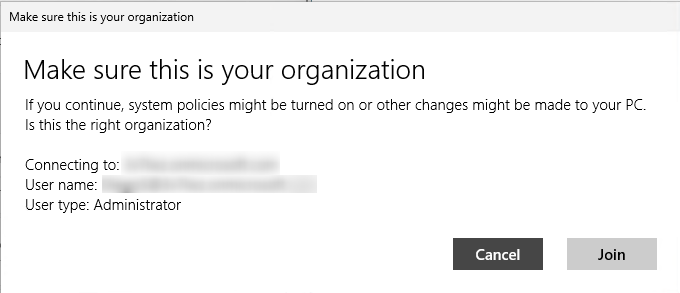
Press join and the registration process will begin. When the process is done, you can switch users and login with your Entra login.
After a while, your device will appear in Entra ID and Intune. You can find it in Intune by going to Devices -> All Devices.
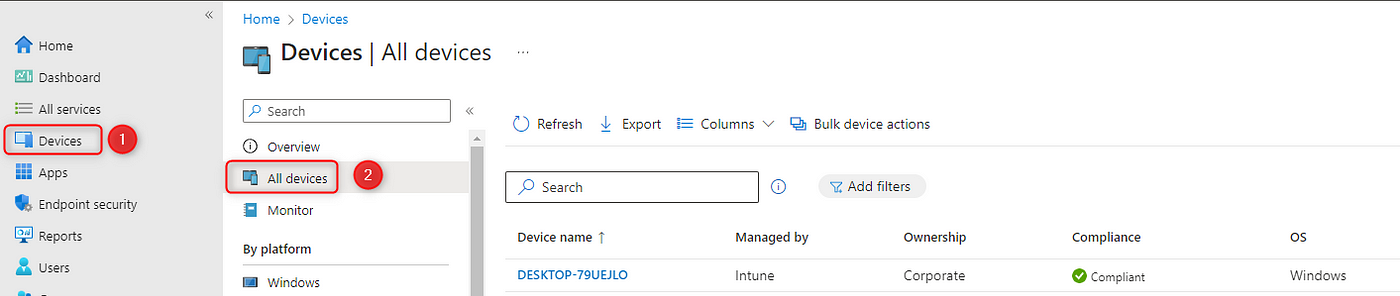
Your device is now enrolled in Intune — Congratulations! It feels good right?
Developer Subscription and Lab for Testing!
When I first started working with Azure, Intune, and Defender, I was looking for a place to test and play around. I would recommend using the Microsoft developer program (https://developer.microsoft.com/en-us/microsoft-365/dev-program), where you can get a complete and preconfigured tenant with E5 Developer licenses.
It’s always best to practice with endpoints when playing around. I would love to have several PCs lying around, but my girlfriend would hate it.
I found this lovely lab kit (https://www.microsoft.com/en-us/evalcenter/download-lab-kit), that has helped me, and it saves me a lot of time.
I wish I had known about these resources before, as they have helped me a lot, and it is always great to have hands-on experience!
Conclusion
Thank you very much for reading this blog post. It means a lot that you took the time.
I hope you find the resources provided in this blog useful, and start creating your own lab environment.