Windows Autopatch: Get Ready to Update

Introduction
We've probably all struggled with keeping our devices up-to-date with Windows, and in today's world we need to make sure that our devices are up-to-date as soon as possible after Patch Tuesday, but with some caveats.
As a company, you have to decide if you want devices to be patched as soon as possible or gradually in rings to spot errors. Previously, you've probably built these rings manually with Windows Update Rings, but this has become a lot easier with Windows Autopatch!
License Prerequisites
I am not a big expert on licenses, but I want to quickly mention which licenses give you access to Windows Autopatch. Per Microsoft documentation, these are the licenses that give you access to Windows Autopatch.
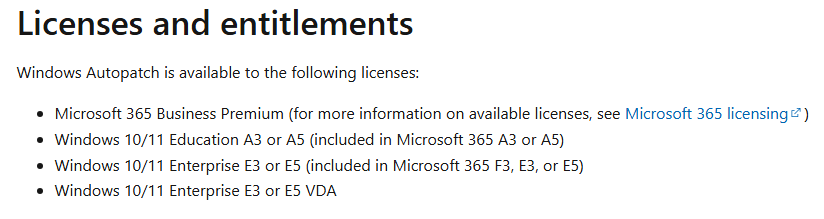
So if you use Business Premium licenses, you have access to Windows Autopatch. There is no reason not to use Autopatch now!
Static/Dynamic Group - Configuration
Before we can start configuring Windows Autopatch, we have to create some new groups that we are going to use to set up Autopatch.
Normally what I do is that I create a static group called "Windows Autopatch Device Registration" and create a new dynamic group containing all the Windows devices for Autopatch. See below for an example.
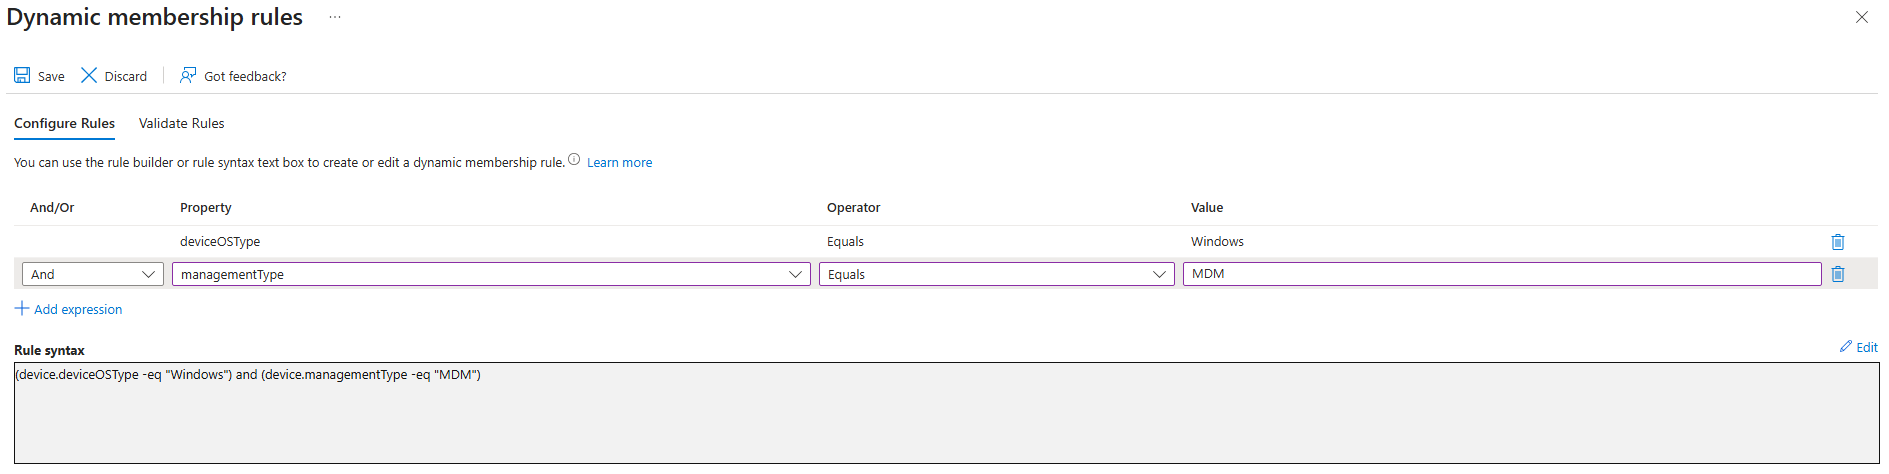
When both groups are created, I will go ahead and nest the dynamic group into the "Windows Autopatch Device Registration" group.
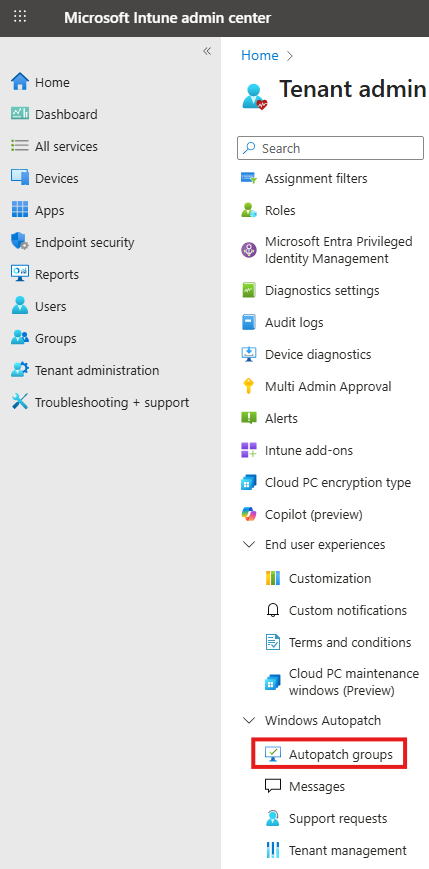
Windows Autopatch - Configuration
Configuring Windows Autopatch will happen directly through the Intune portal, so let's jump directly into it!
- Navigate to "Tenant Administration" and scroll down to the Windows Autopatch section. Select "Autopatch groups", this is where the magic will happen.
- Click on create inside of the Autopatch groups section, and make sure to name it according to your naming convention.
- In the "Deployment Rings" section, we have to add a group for the "Dynamic group distribution". This function will distribute all of your devices in the previously created group into the rings between test and last.

In my example here, I will make sure to add the "Windows Autopatch Device Registration" group.
- Next is to configure how many rings you would like. Again, it's all about how fast or slow you want the updates to arrive. In this example, I will add 3 rings between "test" and "last".
Once you have added the rings, you would be asked to define in percentage how many devices you would like in each ring.
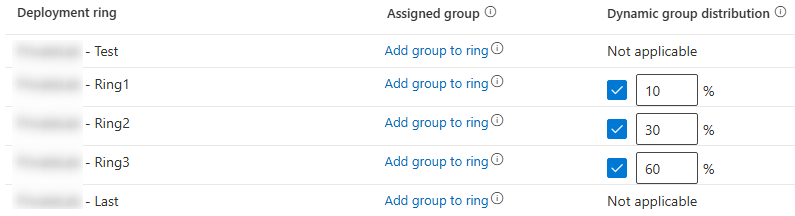
If you want to have members in test or last, you have to manually add a group to these rings.
- Once we've taken care of the configuration of the rings, we need to look into the different update types. Everything except quality updates can be unchecked. I recommend leaving everything checked so Autopatch handles it.
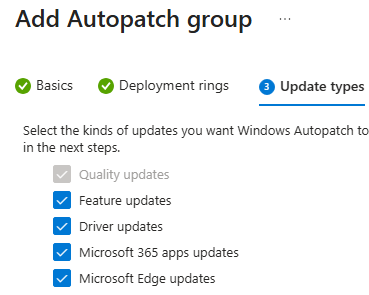
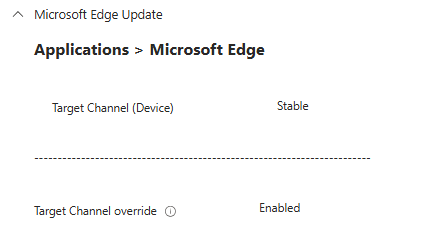
Be aware when you select "Microsoft 365 apps updates" and "Microsoft Edge updates". These configuration profiles will be created once the Autopatch group is created. There can potentially be some conflicts if you already have something configured for Edge and Office!

- There are a few deployment settings that I want to point out. In general, make sure to review the settings and change them so they fit your company. However, it might also be time to review your current configuration and see if you can make improvements.
Feature Updates: The first one is the feature updates, please be careful here. What Autopatch will do is that it will create a single feature update that, by default, will update all your devices to Windows 24H2.

If all of your devices are on Windows 11 24H2, no worries! However, if you have devices on Windows 10 still, you might want to set the target version to Windows 10 22H2.
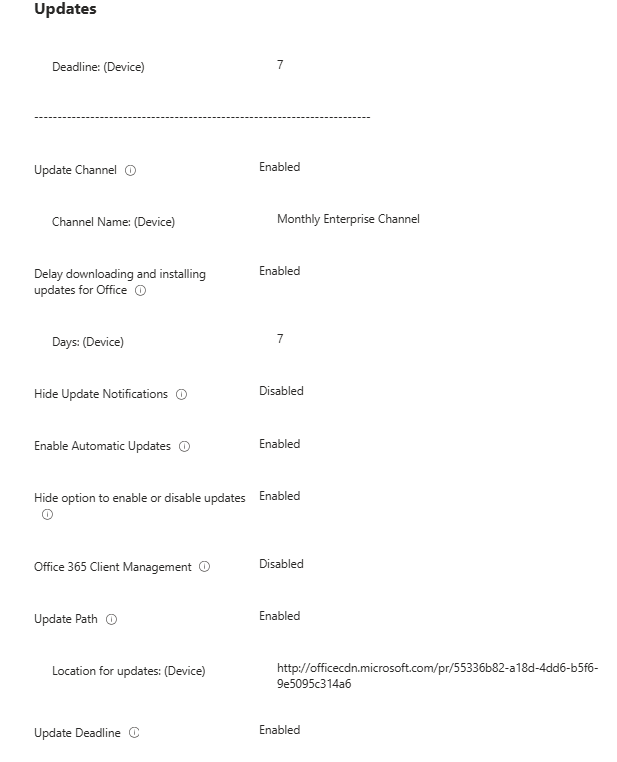
Microsoft 365 apps updates: Microsoft 365 apps will be configured by default with "Monthly Enterprise Channel", when configuring an Autopatch group.

If you are currently running with a different update channel, make sure to review the configuration profiles that are created.
The next configuration, and last one, is the release schedules. Here I wouldn't change the default settings, but it's possible if you wish to change them.
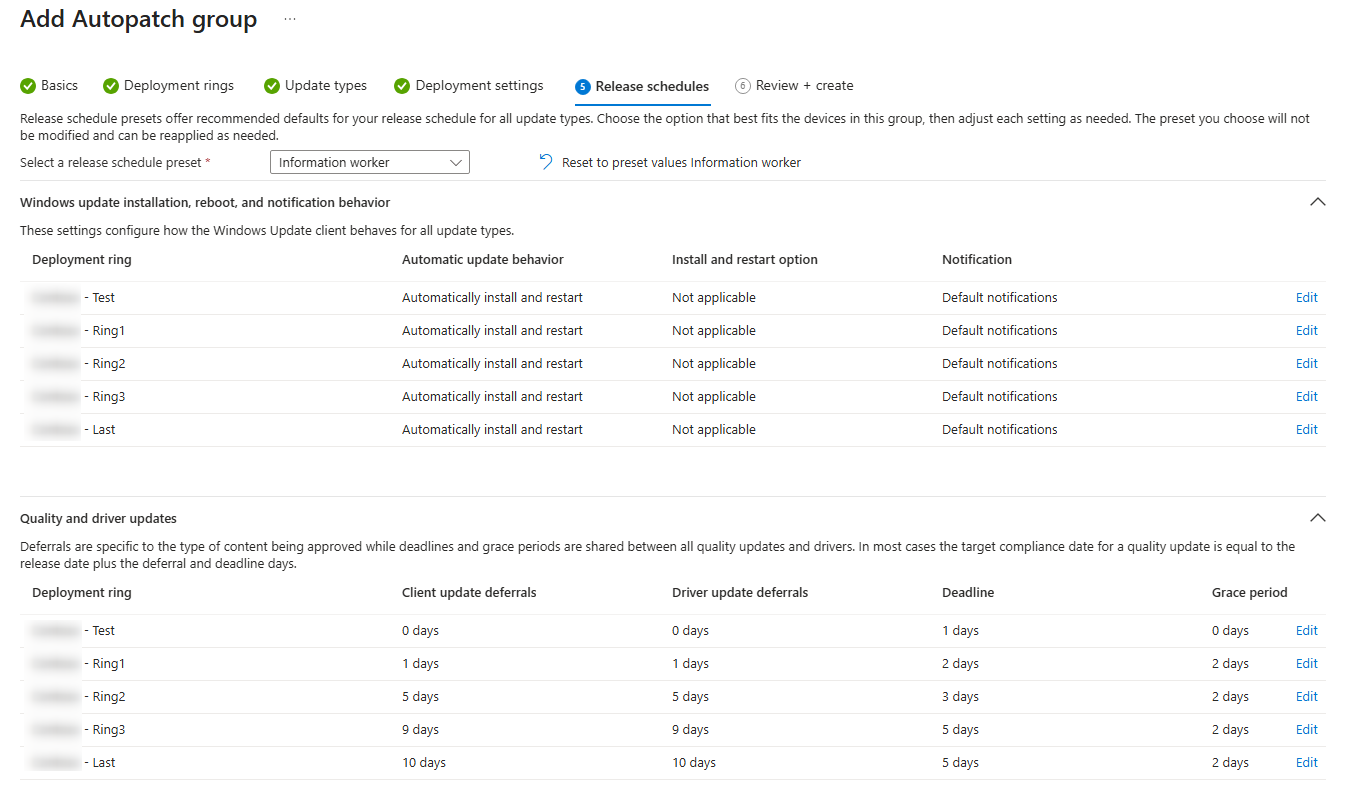
If you have any reboot sensitive devices, such as production machines or similar, you also have the possibility to change the release schedule preset. For these types of machines, I recommend creating a separate Autopatch group.
- Once you have reviewed your configuration, go ahead and create your Autopatch group!
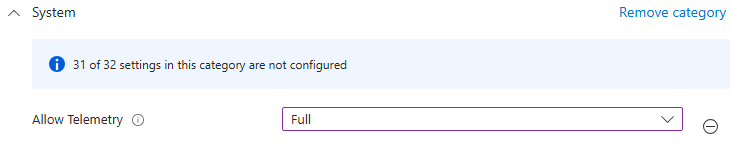
Before the reports for Autopatch would work as expected, you would have to configure the level of telemetry on the device.
- In the Intune portal, click on "Devices" and "Configuration". From here, click on create new policy, and select settings catalog.

- Name the policy according to your naming convention and click next. Search for "Allow Telemetry" and configure it to full.
- Roll the policy out to a group of test devices, and see if you get the expected results in your reports.
Let's see how it works!
Once your Autopatch group is created, you will see some new configuration in your tenant. You will see an Autopatch group appearing under "Windows updates" with multiple update rings.
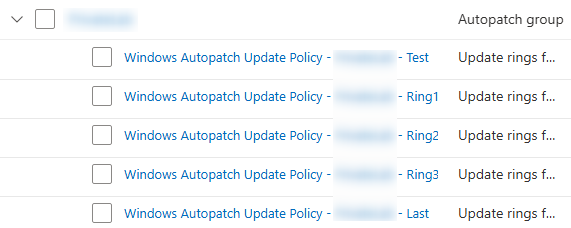
For the feature updates, it's a little bit different. You will only see one policy created.

If you have selected Edge and Office 365 updates as well, you will see new configuration profiles created.
Make sure to remove the assignment from the old update rings so you don't get any conflicts. The same goes for Edge and Office updates!
Onboarding to Windows Autopatch
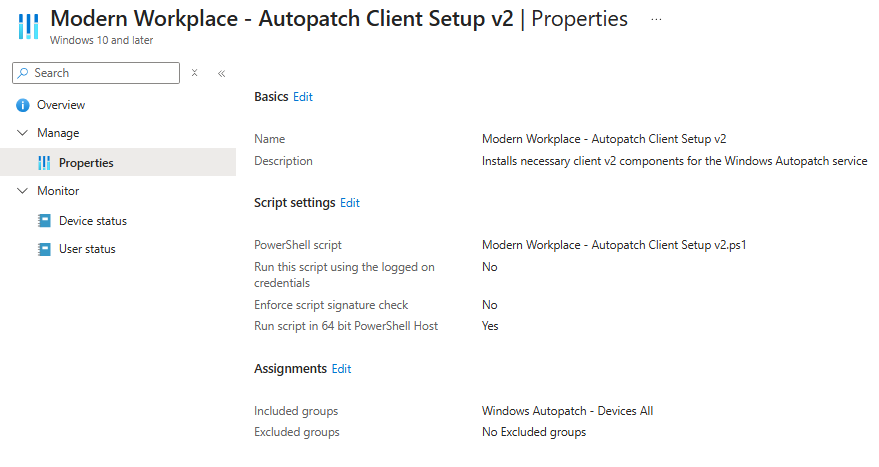
The devices need the Autopatch client to get installed on their device, and by creating an Autopatch group, it will automatically create this platform script in Intune.
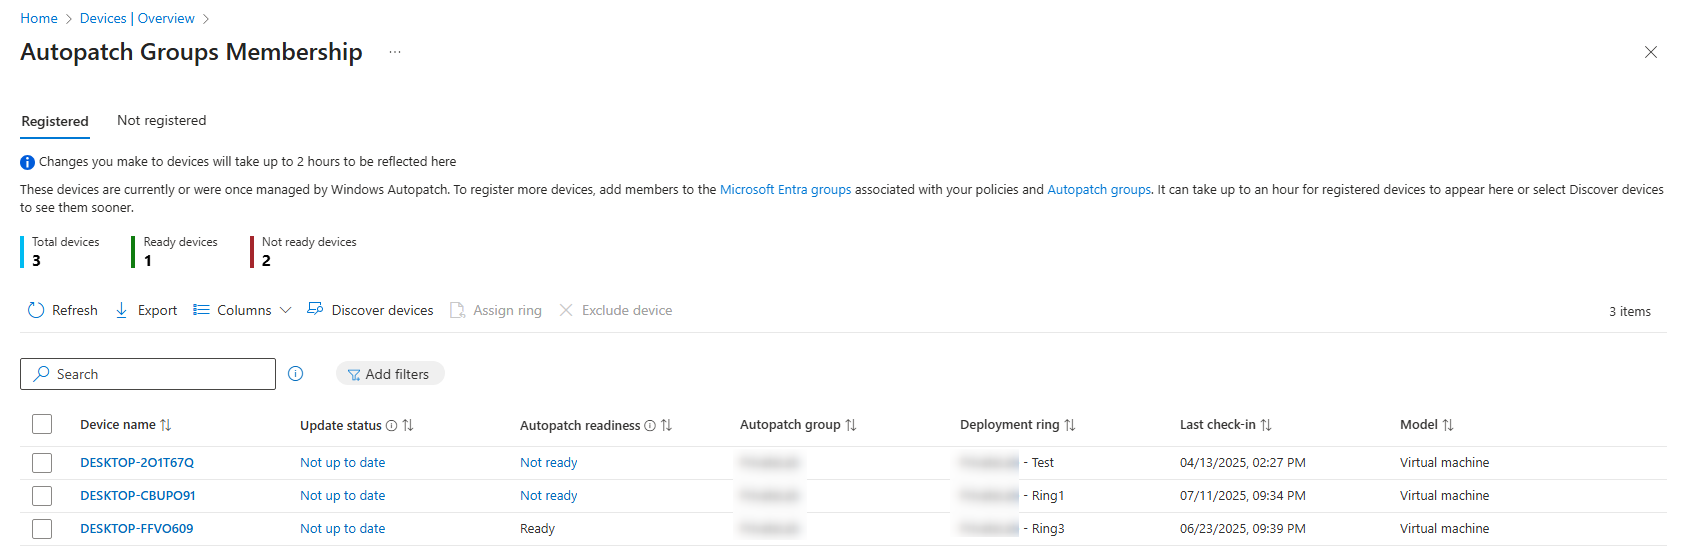
Once the device gets onboarded to Windows Autopatch, you can see their current status under "Devices" in Intune.
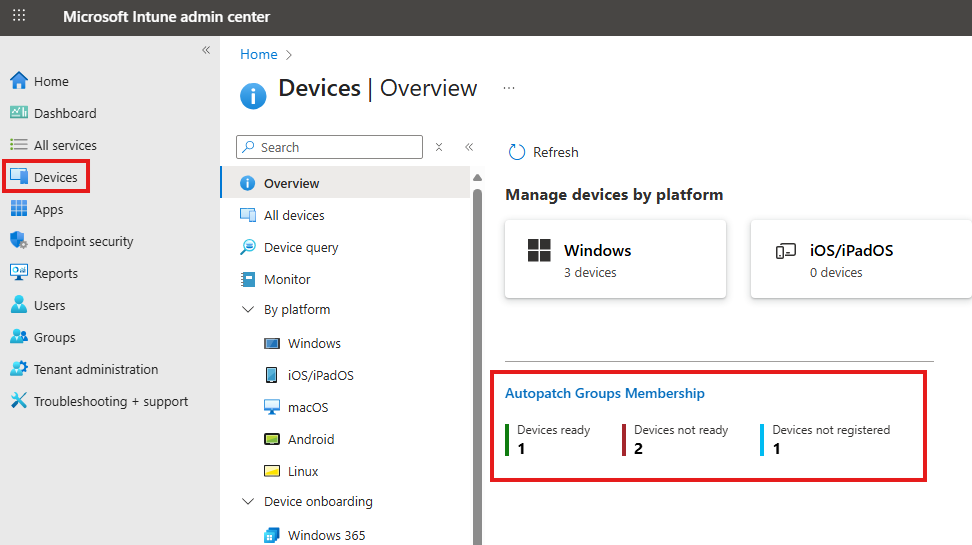
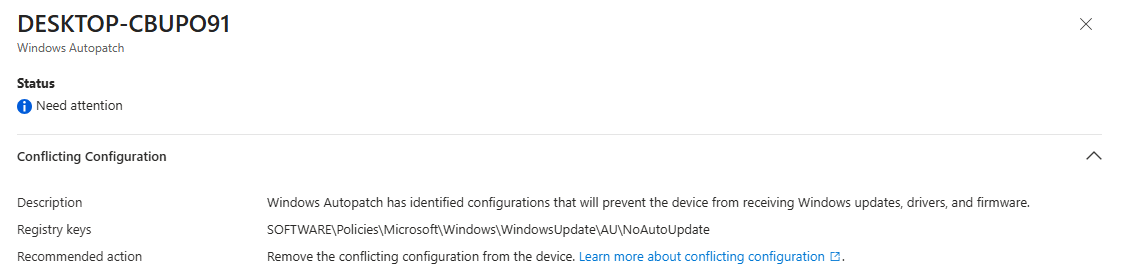
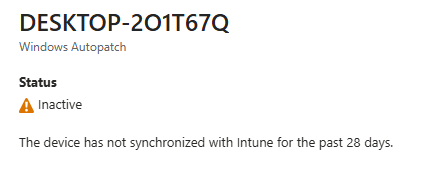
If you click on "Autopatch Groups Membership", you would be able to see if they are registered or not registered with Autopatch. You would also see if they are ready for Autopatch (stale device or conflicting configuration).
All in all, Windows Autopatch gives you a lot of great information that you wouldn't get by using regular Windows Update Rings.
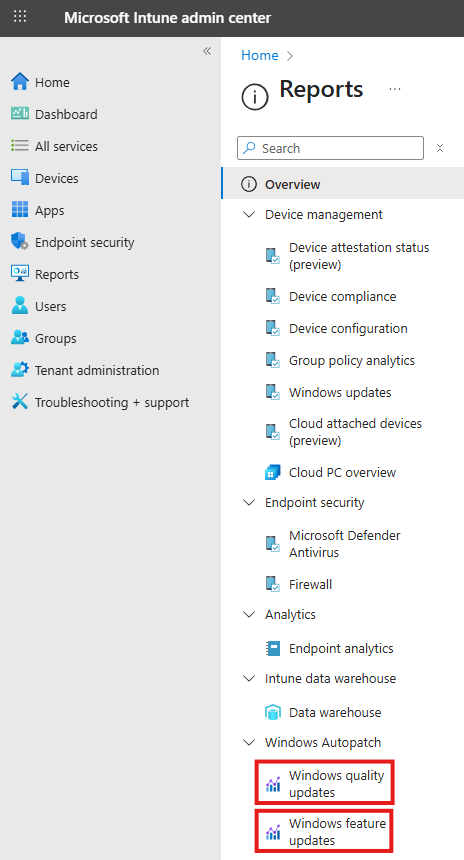
Reporting
For the reporting part, there are some great reports for both quality and feature updates. If you navigate to "Reports" in Intune, you can see the different reports available. At the bottom, you will see the reports for Autopatch as shown below.
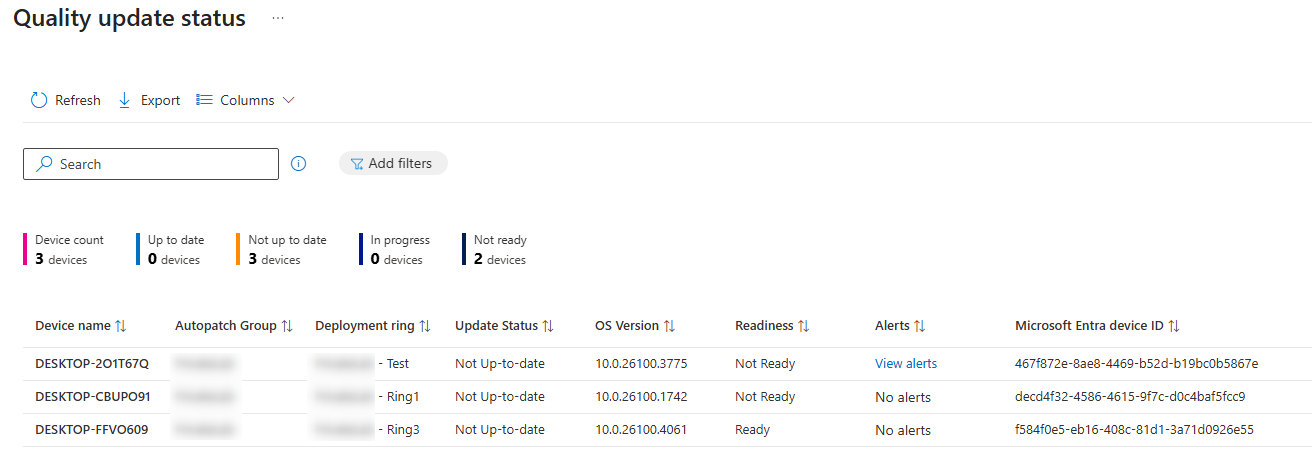
As an example here, I have clicked on the quality update report. From here you will get a quick overview of how many devices are up-to-date, not up-to-date, and in progress.

If you want more information on each specific device, you can click on the number at device count and get to the below view. From here you can see if there are any alerts you have to take care of.
Conclusion
Thanks a lot for reading this blog post about Windows Autopatch. I hope it helped you configure it and gave you some insights into how it works.