Windows LAPS - The beginning


What is LAPS?
LAPS is short for Local Administrator Password Solution, and if I should say it correctly, Windows LAPS. LAPS is a solution that rotates and manages the administrator passwords on devices.
LAPS is a feature within Windows, but before that, it was a separate program that was installed on a device.
Windows LAPS is available within Entra ID (Azure AD) or Active Directory (ADDS).
Configuration of LAPS
We have now arrived at the part that I love the most. The configuration of LAPS in Intune. Let's jump straight to it!
First of all, we have to make sure that LAPS is enabled in Entra ID. Even though LAPS is a feature within Windows, it isn't enabled by default.
- Head into entra.microsoft.com
- Under the identity category, select devices and all devices.
- Select the device settings and scroll a bit down.
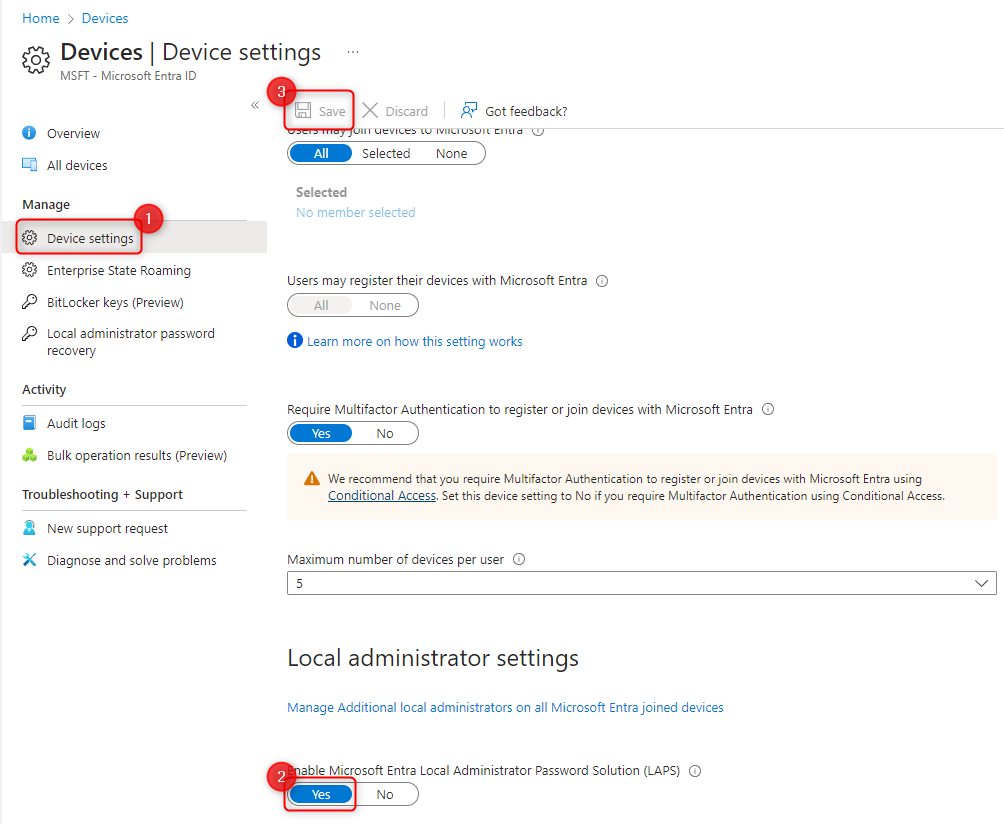
- Make sure that it's changed to yes, and click SAVE.
Now that LAPS has been enabled, we will quickly jump into the Intune portal.
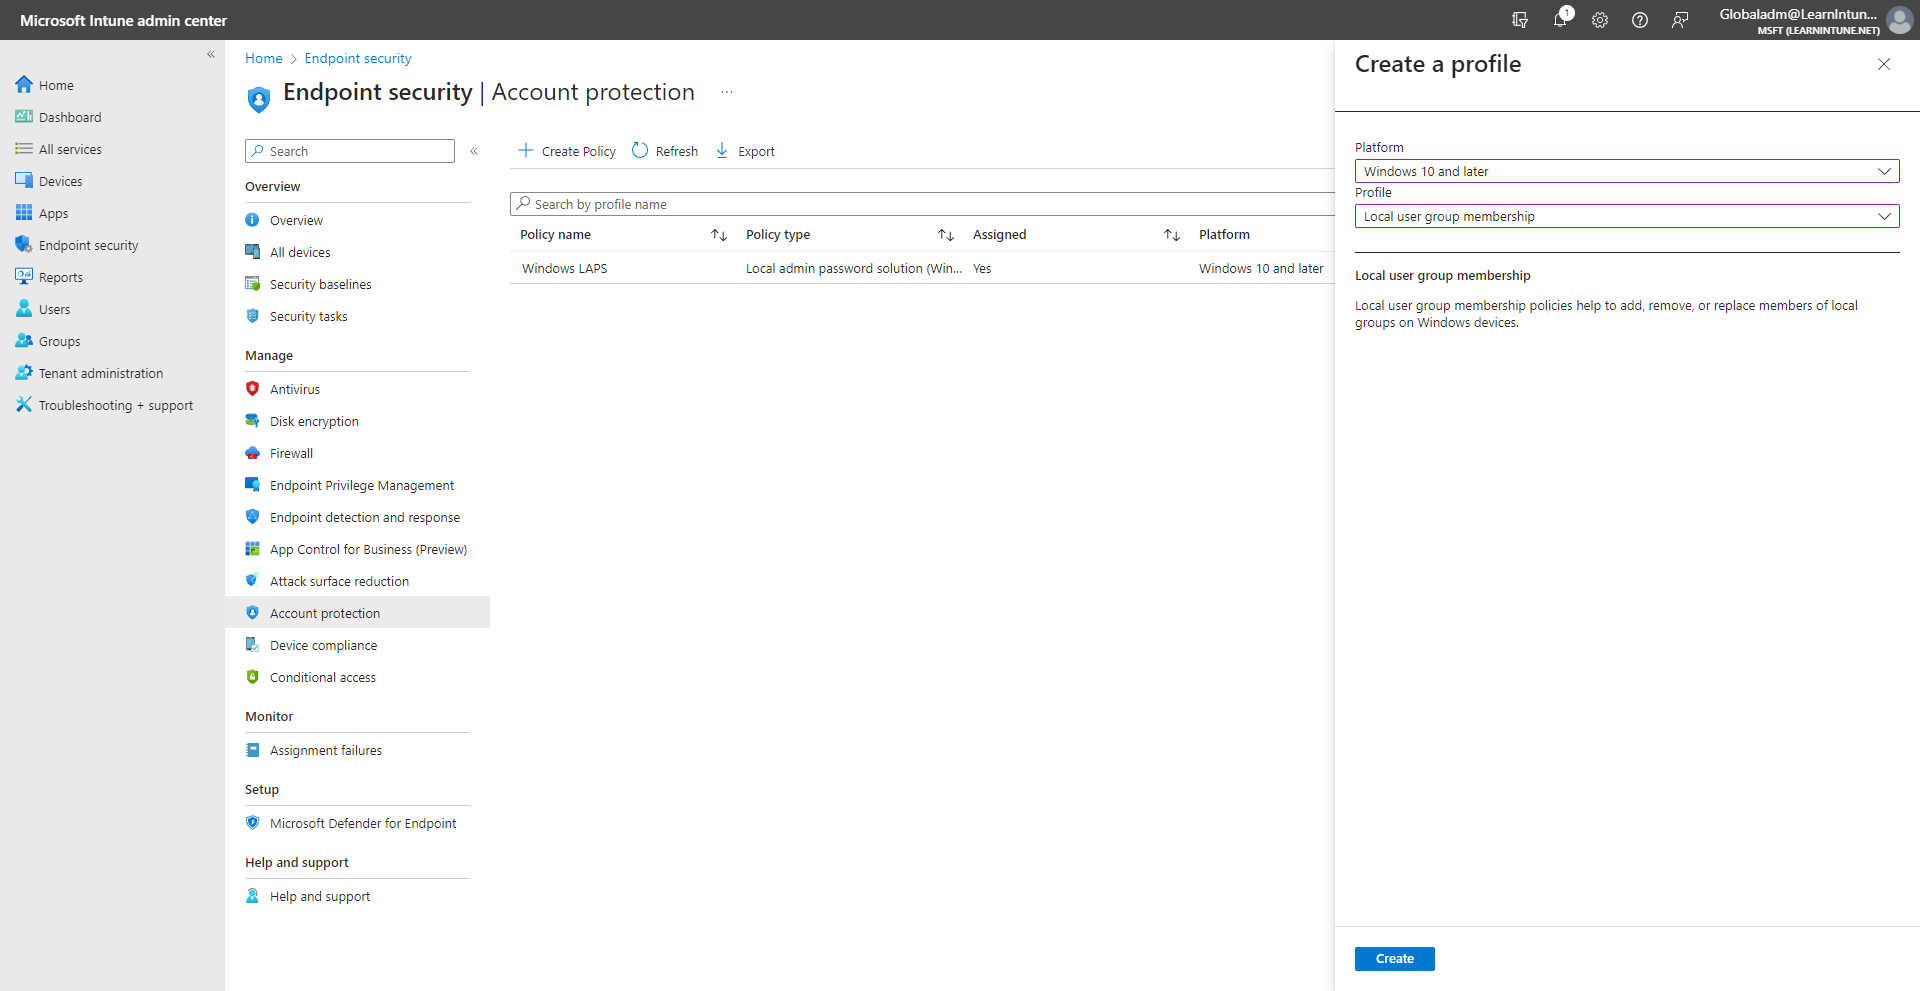
- Select endpoint security, and click on account protection.
From here, we would have to create two policies. The first is for LAPS itself, and the other policy is to clean up the local administrator group on the devices. I will get back to that one.
- Click create policy, and make sure to pick Windows 10 and later and Windows LAPS.
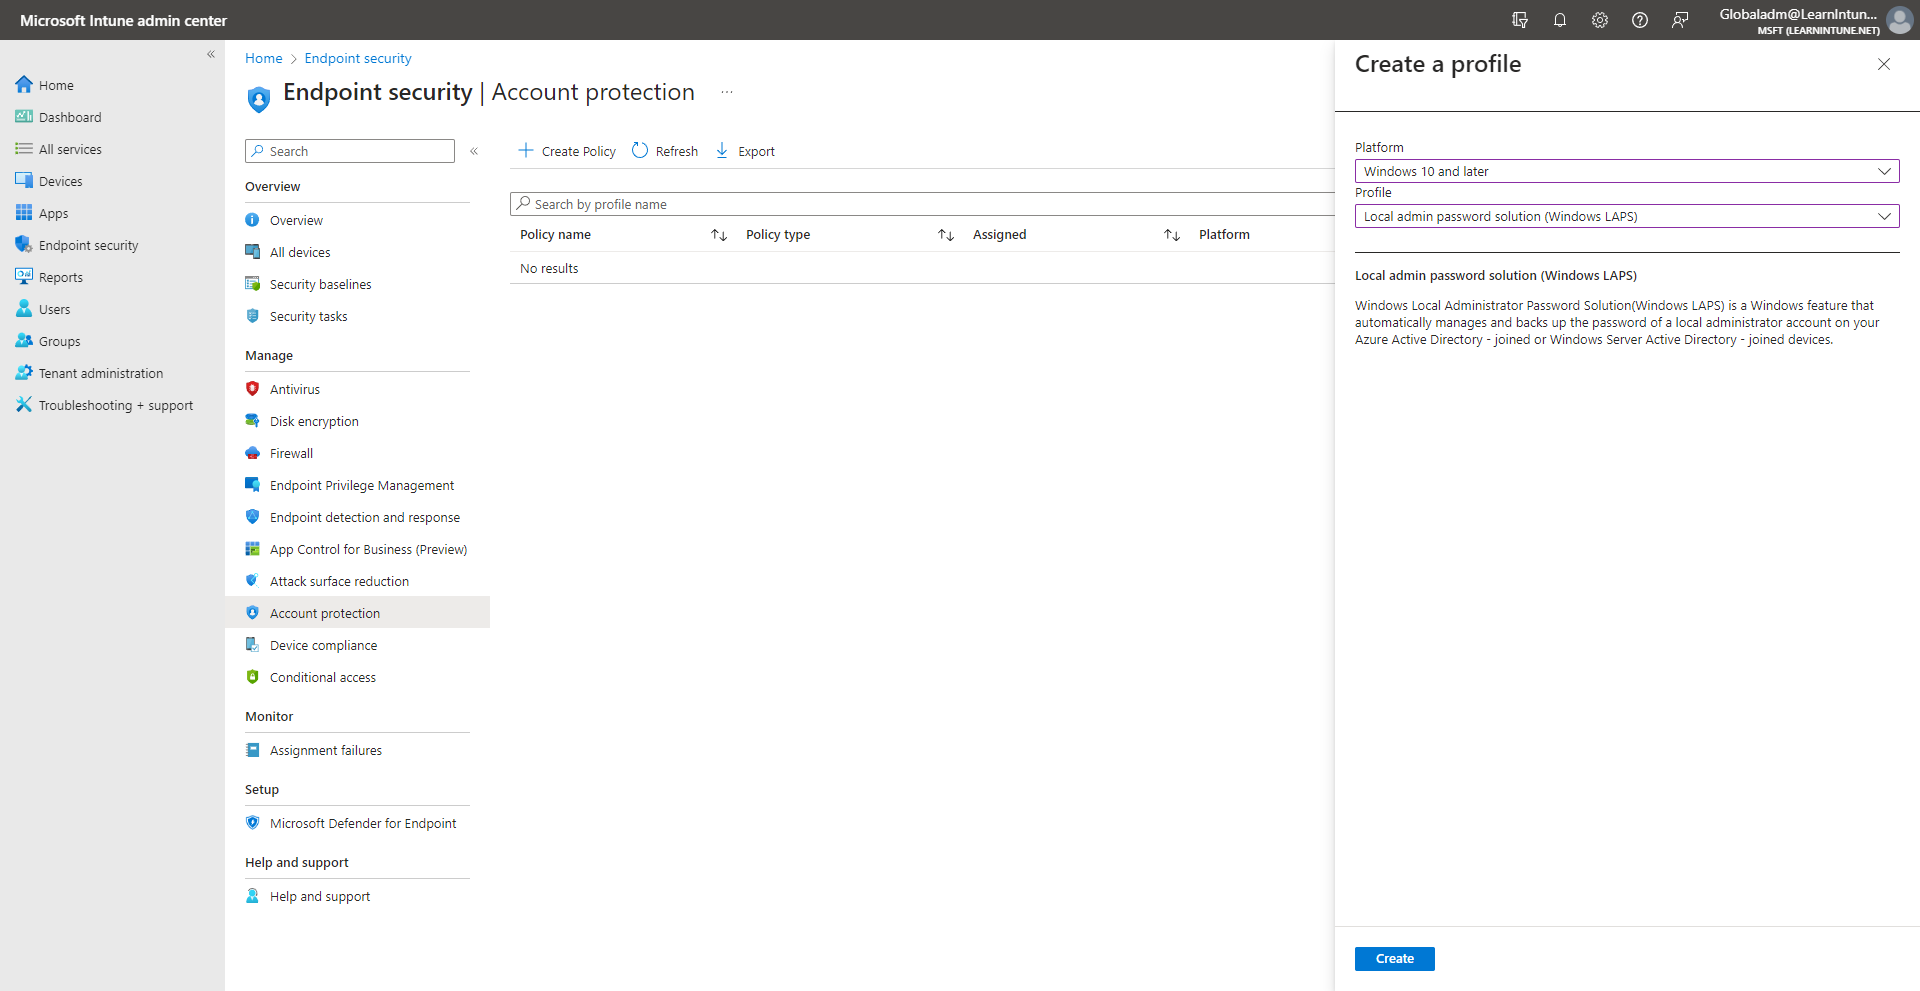
- When you have given the policy a name, let's jump into the configuration.
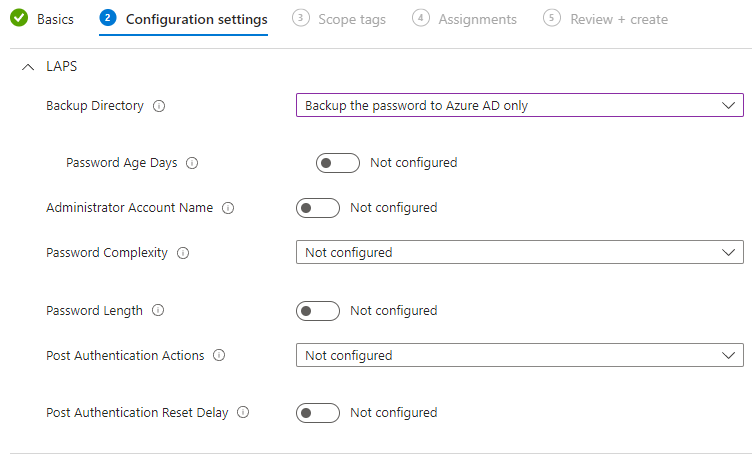
Backup Directory
The first setting is the backup directory. The backup directory will be the place where the password for the "Administrator" user will be stored.
- Disabled - The password will not be backed up to any of the directories.
- Backup the password to Azure AD only - The password will be available within Azure AD only, and NOT Windows Active Directory.
- Backup the password to Active Directory only - The password will be available within Active Directory (ADDS) only and NOT Azure AD.
- Not configured - The password will not be backed up to any of the directories.
Since my devices are Azure AD joined only, I choose to back my passwords to Azure AD.
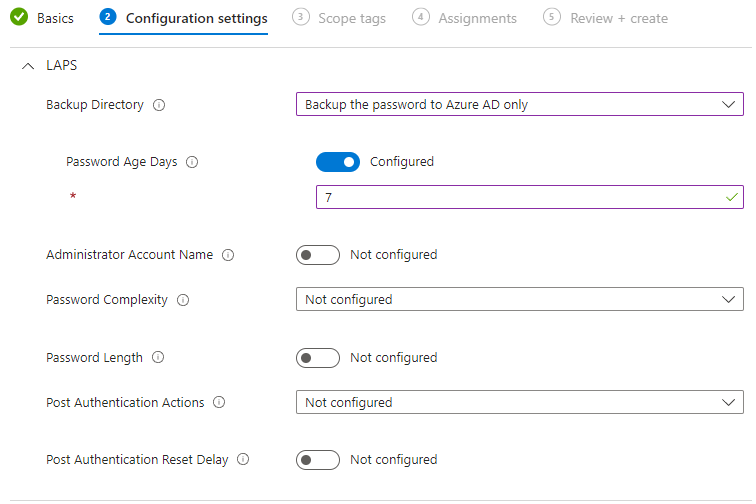
Password Age Days
Woop! As you can see, a new setting popped up. The next setting is the password age days. This defines how old the password can be for the local administrator account, if the password hasn't been used.
The default age is 30 days, and I wish to change it to the minimum allowed, which is 7 days for Entra ID (Azure AD).
Administrator Account Name
Next up is the administrator account name. As Microsoft explains in the little (i), if the setting isn't configured, it will automatically use the built-in administrator on the device.
If you wish to use another account, you would have to configure the policy and enter the name of the account that you wish to use with LAPS. This will not create the custom account, you would have to create the account on your devices, if you wish to use this option.
As of now, I have chosen to use the built-in administrator account, so I will leave the policy as it is.
Password Complexity
Password complexity is up next, as the name of the policy states, we have to define how complex we would like the password.
The moment I'm writing this blog, we have these 4 options available.
- 1 = Large letters.
- 2 = Large letters and small letters.
- 3 = Large letters, small letters, and numbers.
- 4 = Large letters, small letters, numbers, and special characters.
The recommendation from Microsoft is that you use option 4. Whether you should use option 3 or 4 should be up to you. I will select option 4, and my colleagues from the service desk will be really happy! 😎
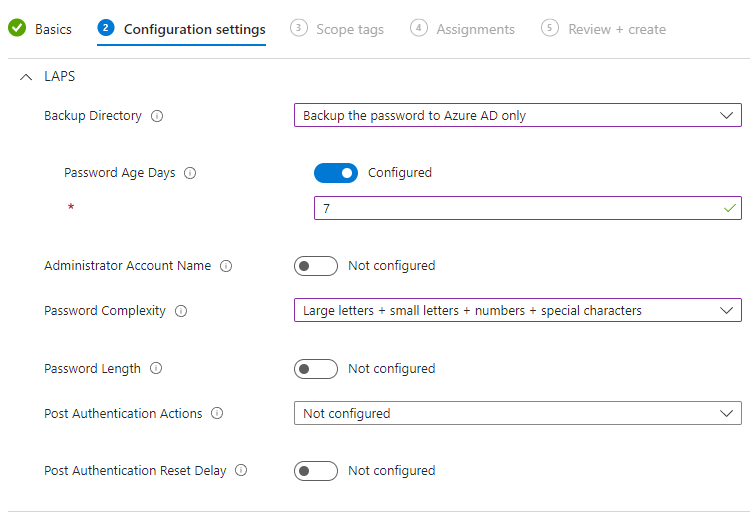
Password Length
Another topic that is definitely up for debate is the password length! The default length without configuring the setting is 14 characters. The maximum is 64 characters.
The 14 characters are fine with me, so I won't configure the setting.
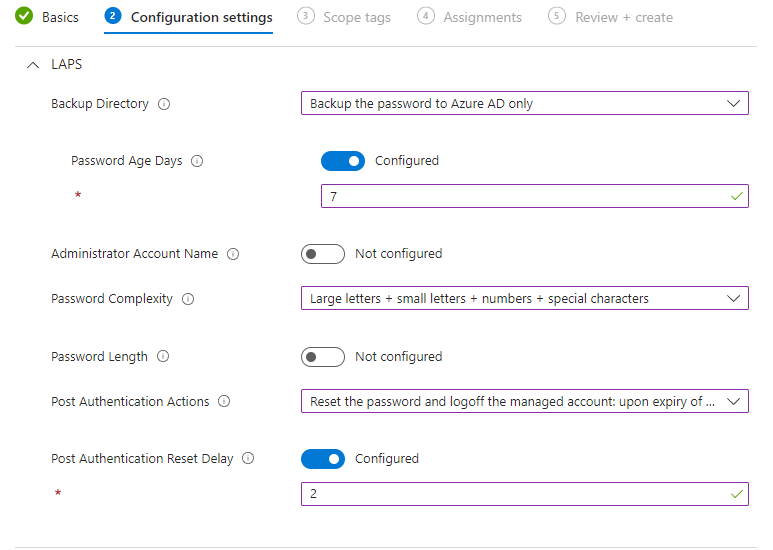
Post Authentication Actions
This one is quite important, it will define what will happen when we use the LAPS password on a device and the grace period has expired.
- Reset password - The password will be changed after the grace period has expired, and no other actions will be taken.
- Reset the password and logoff the managed account - The password will be changed, and the sessions with the managed account will be terminated.
- Reset the password and reboot - The password will be changed, and the device will reboot after the grace period has expired.
- Not Configured - When selecting not configured, it will automatically be "Reset the password and log off the managed account".
For the post-authentification actions, I choose option number 2 (reset the password and logoff the managed account).
Are you confused about what the grace period is? We will configure the grace period in the next setting, or, let's say, reset delay instead of grace period.
Post Authentication Reset Delay
This setting defines how long it will take before it starts the post-authentification actions.
The minimum value is 0 hours, and that will disable the post-authentication action you defined in the last setting. The maximum value is 24 hours. I will configure this setting to 2 hours, my LAPS policy is now finished.
Before I can finish the policy, I have to assign it to my test device. As always, remember to test your policies before putting them into production!
Let's clean up the local administrator group!
If all your users have local administrator rights, is it important to know that the LAPS policy itself won't remove the user as a local administrator on the device. We can create a policy within account protection for that!
First of all, create a new policy. Select Windows 10 and later and local user group membership.
Name the policy as you like, and click next!
You will hopefully now see the same as I do, Microsoft has defined the "first" setting in the policy.
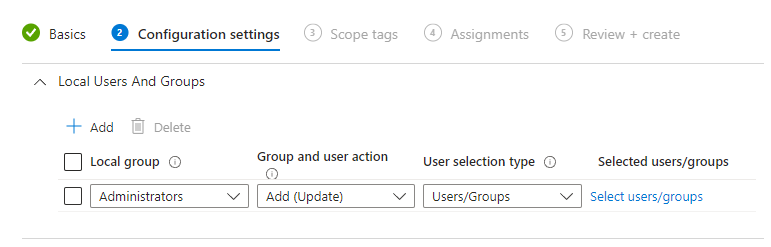
From here, we can see that the local group is "Administrators" which is great. That's the group we want to target. The group and user action is "Add (Update)", which will just add the user/group we define and keep the other members intact.
We don't want to keep the group intact, we just want to make sure that the built-in administrator is part of the group. So we will change it to "Add (Replace)". This action will remove all members from the local administrator group and add the users/groups we define.
The user selection type has to be manual, and we will now be able to add users. Your policy should end up like this one if you only want to keep the built-in administrator user.

Last but not least, I need to assign it to my test group of devices.
Unlock the administrator user!
You might notice that the built-in administrator user is disabled on some or all devices. There is a simple and quick fix for that within Intune.
- Head into the devices category within Intune and select configuration profiles.
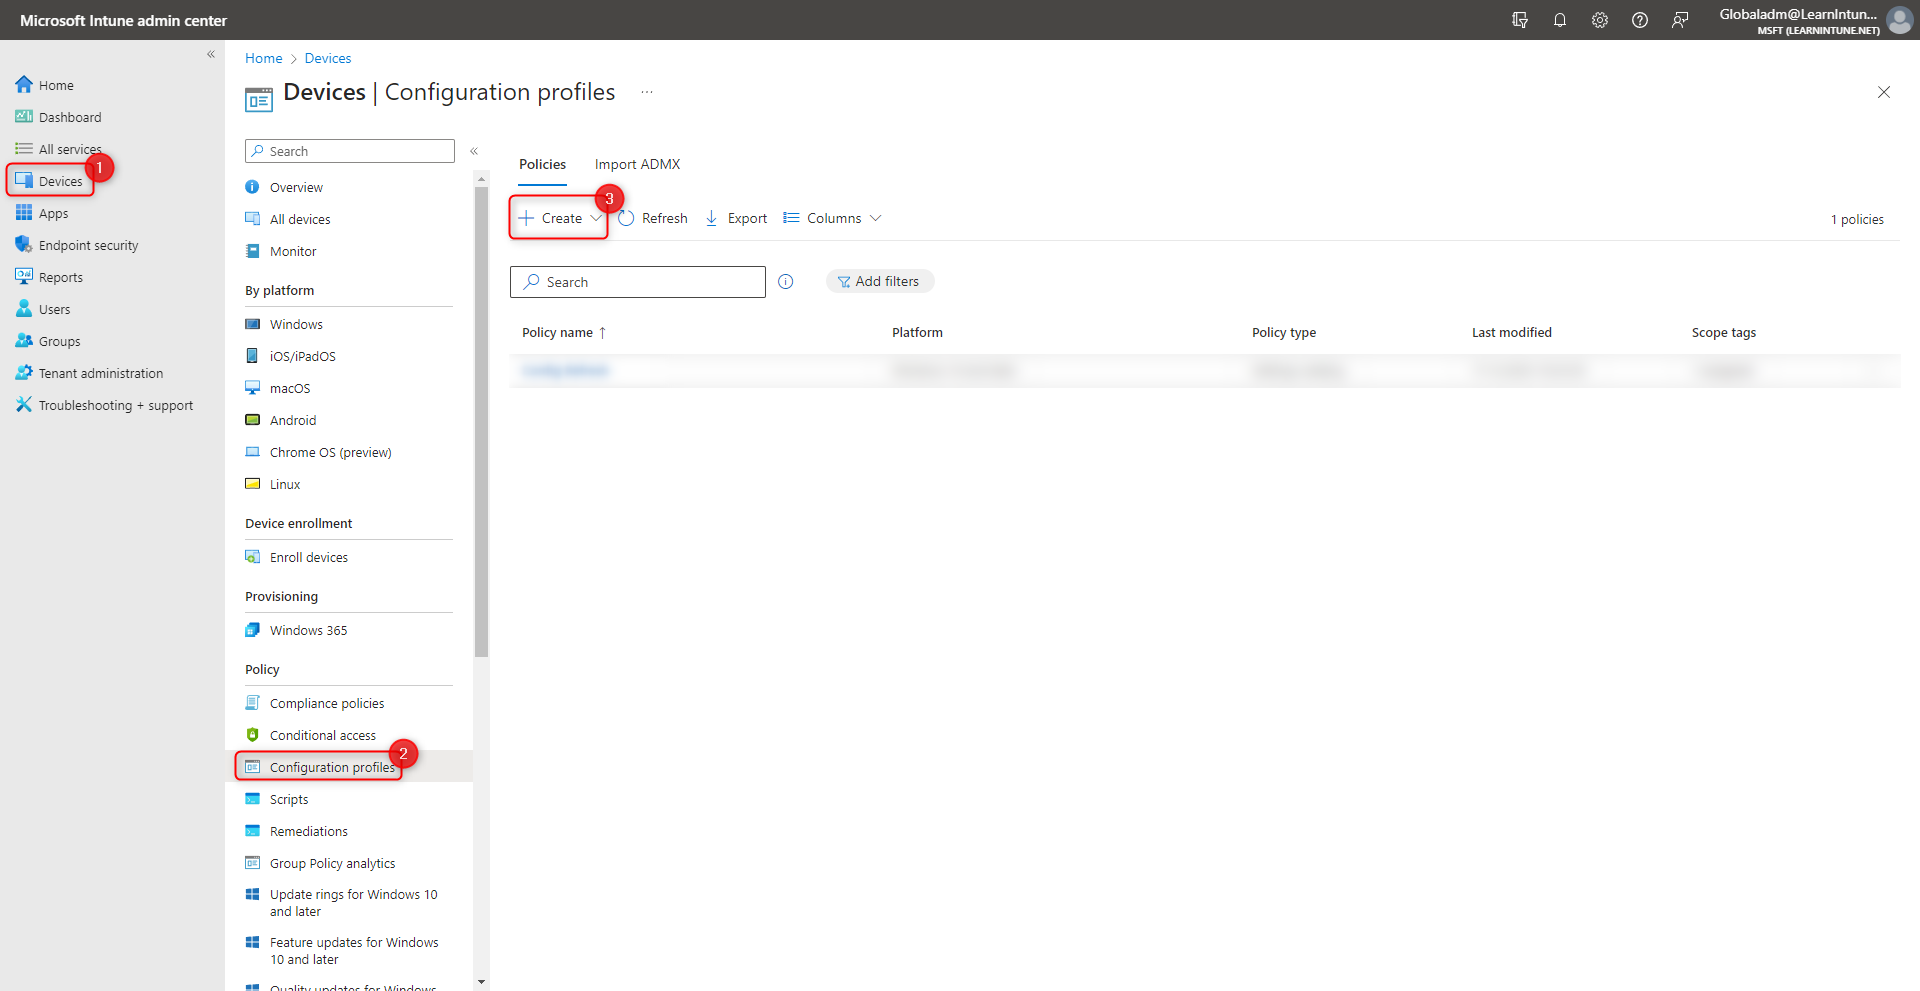
- Click create new policy, and select Windows 10 and later and Settings catalog.
- Give the policy a name, and hit next!
- Click on add settings, and search for "Accounts Enable".
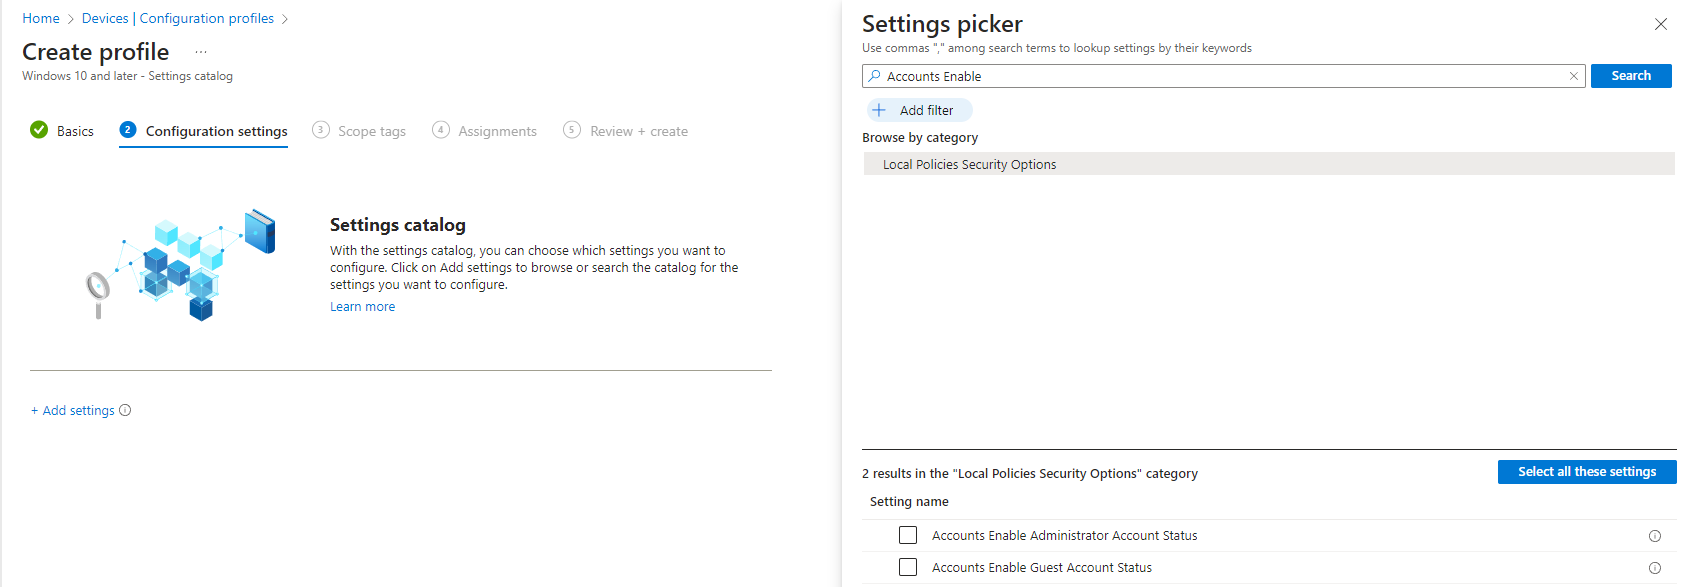
- Make sure to select "Accounts Enable Administrator Account Status", and enable the setting.
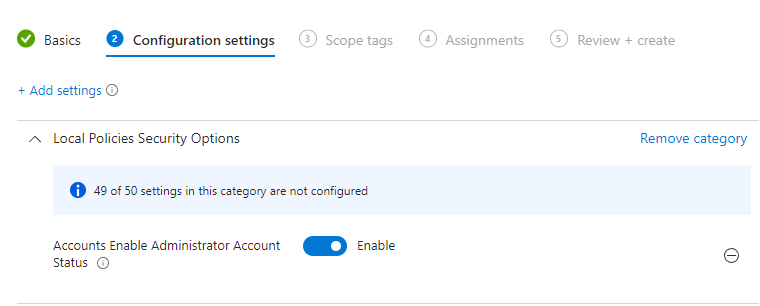
- Click next and assign the profile to your test devices.
It's testing time!
Let's start up our test device and try to see what has happened.
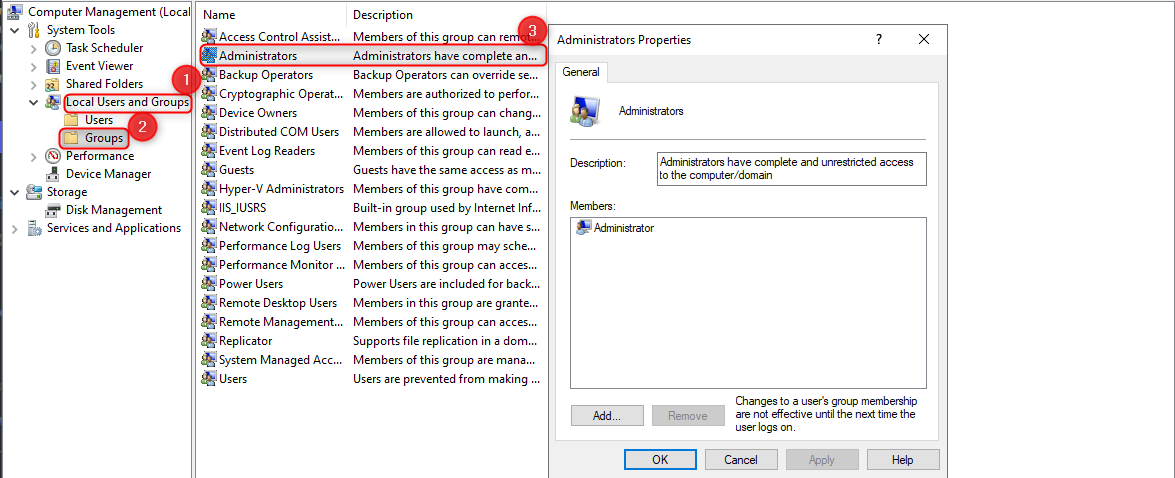
I have now started computer management on my test device, and I can see that my account protection policy has cleaned up the "administrators" group.
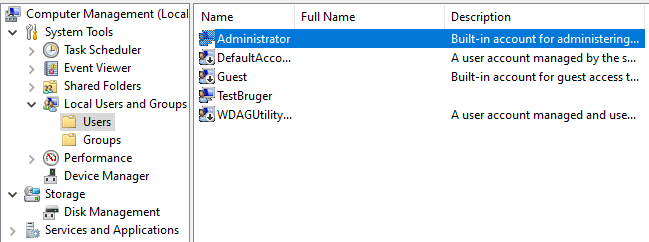
The built-in administrator has also been enabled on my test device, as you can see under the users section.
We have now confirmed that our local user group membership policy and our configuration profile for enabling the built-in administrator are working.
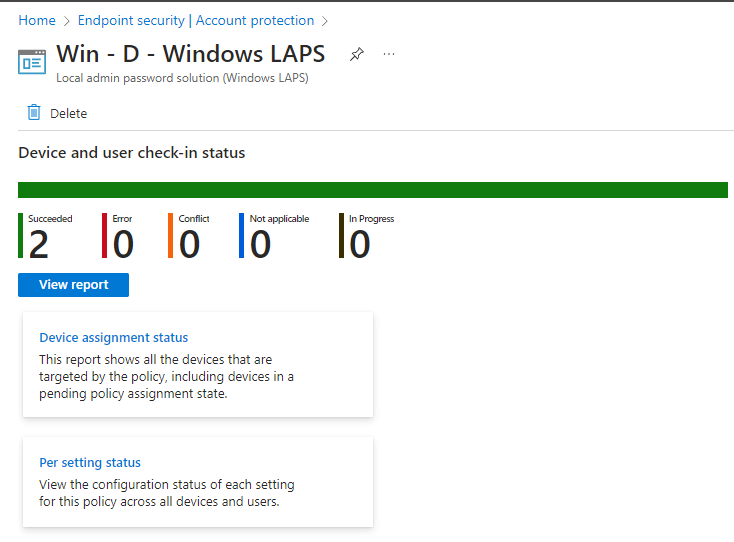
Last but not least, we have to check that our LAPS policy has been applied. A great and easy way to check that is through the Intune portal. I found the LAPS policy under account protection and can see that my policy has succeeded.
Enough talking, let's get into testing the LAPS solution. I will go ahead and start PowerShell as a admin, and see what happens. I get this pop-up on the device.
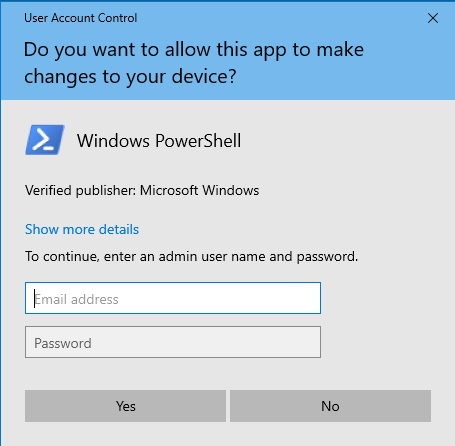
This is the exciting part, in the email address field, I type ".\Administrator" and I can find the password in either Entra ID or Intune.
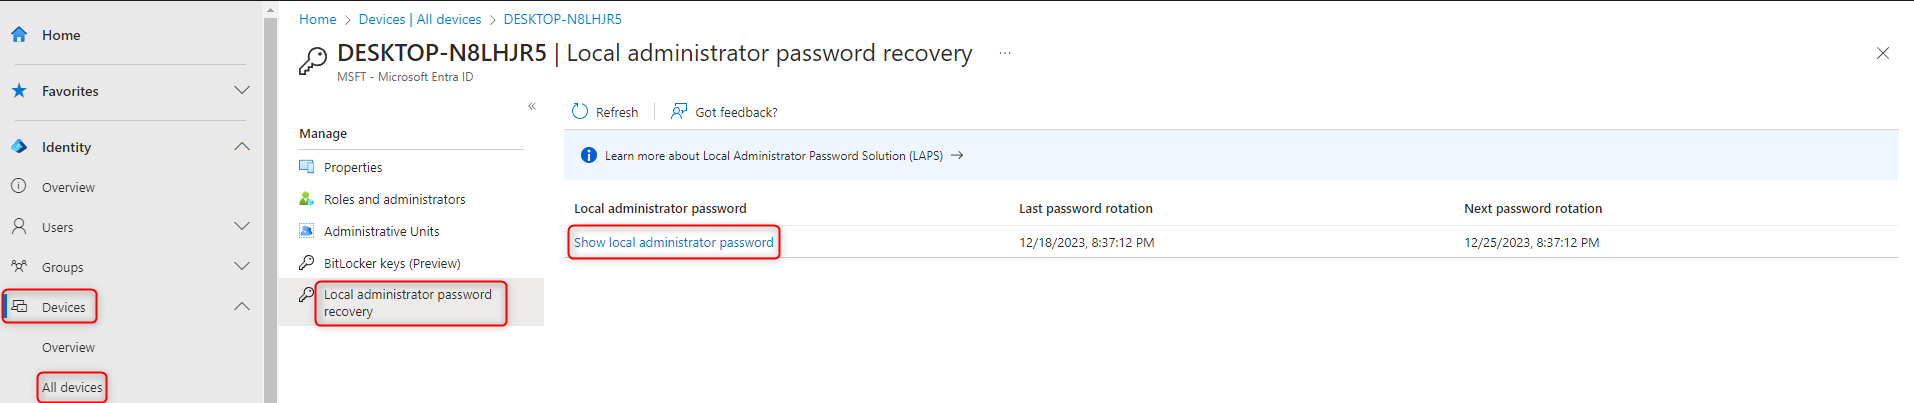
- Entra ID: Devices -> All devices -> Chose the device -> Local administrator password recovery
- Intune: Devices -> All devices -> Chose the device -> Local admin password
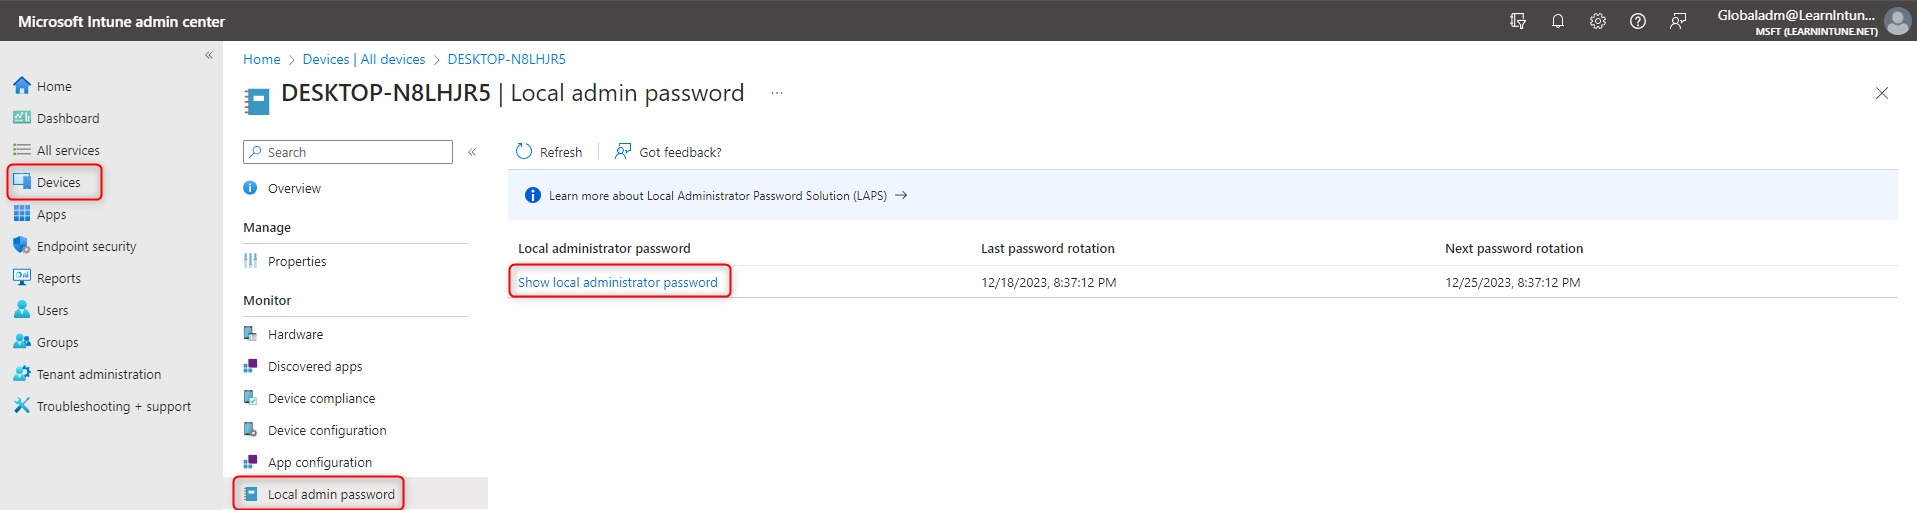
I will get the password from either the Intune or Entra ID portal and type it in the prompt on the device, and Powershell will now open as an administrator.
Observations
I will just share some observations, that I have discovered through the setup of LAPS.
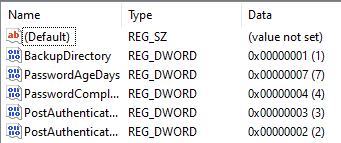
If you go to the following path in the registry editor: "HKEY_LOCAL_MACHINE\SOFTWARE\Microsoft\Policies\LAPS". It will show the policies applied to the device as shown below.
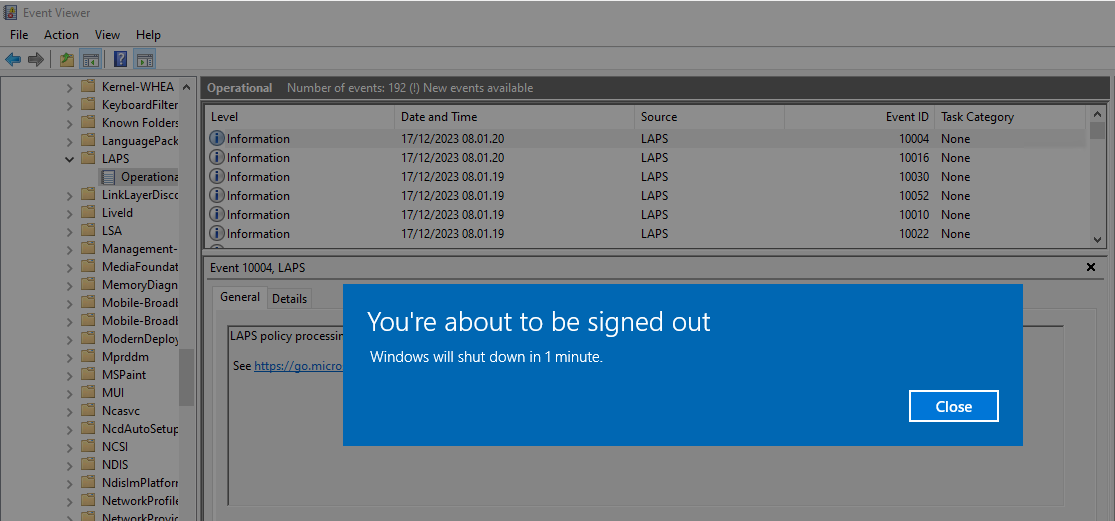
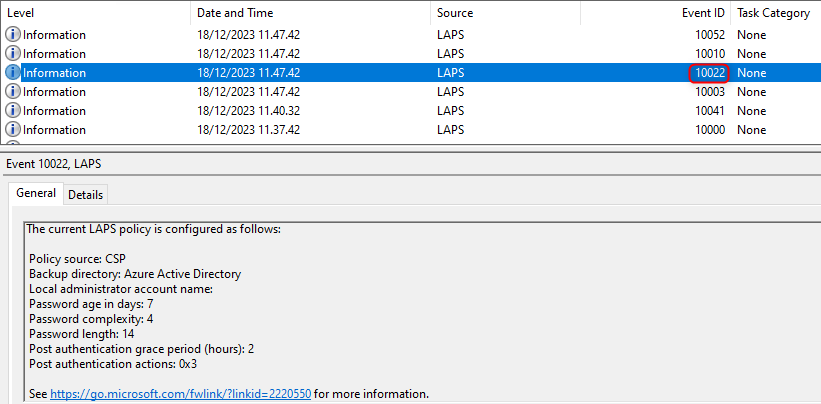
Another observation, that I wanted to share with you, is from the event viewer. If you open Applications and services logs -> Microsoft -> Windows -> LAPS -> Operational.
Look out for event IDs 10003 and 10022, when you are trying to figure out if your LAPS policy has been applied.
Event ID 10003 - LAPS policy is being processed.

Event ID 10022 - LAPS policy applied to the device.
Conclusion
Thank you very much for reading this blog post, I know it's been a long post, but I wanted to make it as detailed as possible and beginner friendly.
Merry Christmas and a Happy new year.